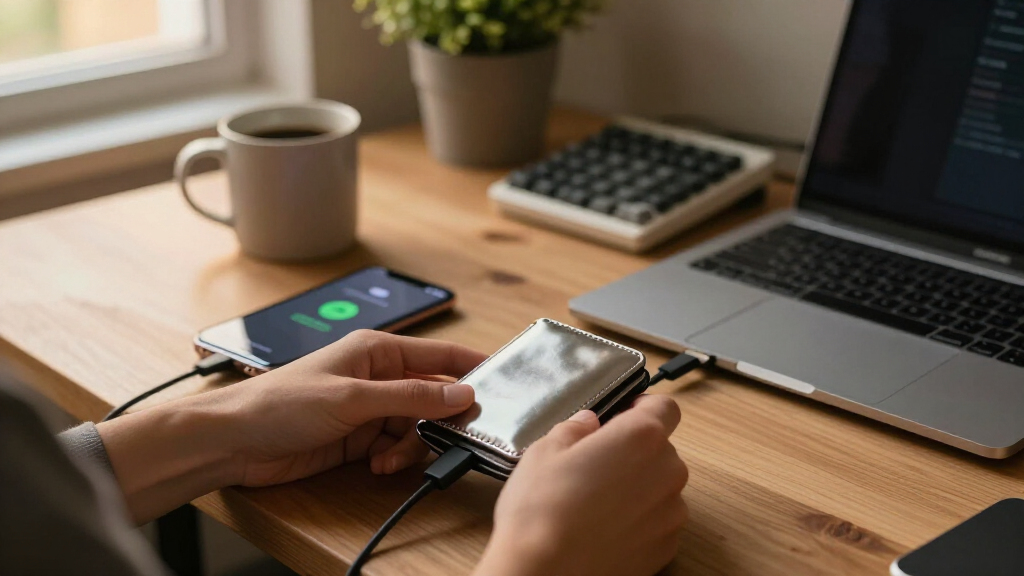

This guide walks you through the complete process of setting up a hardware wallet for the first time: buying the device without exposing yourself to tampering, initializing it, writing down and verifying your recovery phrase, installing the companion app, and sending a small test transaction before moving your full balance. By the end, your cryptocurrency will be held by private keys that never touch an internet-connected computer.

Get hardware and tech essentials delivered free — and shop member deals
- Fast, free delivery on millions of items
- Access to Prime Big Deal Days deals on October 6–7
- Prime Video, Amazon Music and more included

Tangem Crypto Wallet (Pack of 2) – Cold Storage Hardware Wallet
- ✔ Security Certification: EAL6+ (military-grade)
- ✔ Blockchains Supported: 90
- ✔ Coins & Tokens Supported: 14,100+

Ledger Nano X – Crypto Hardware Wallet with Bluetooth
- ✔ Memory Storage Capacity: 2.05 MB
- ✔ Connectivity: Bluetooth, NFC, USB
- ✔ Display: 1.1 inch

Trezor Safe 3 Crypto Hardware Wallet (Cosmic Black)
- ✔ Secure Element: EAL 6+
- ✔ Display: OLED screen
- ✔ Connectivity: USB-C
This guide is written for beginners who currently hold crypto on an exchange or in a software wallet and want to take self-custody. No technical background is required — every step uses consumer hardware and a desktop browser or phone app. Expect the active work to take 45 to 90 minutes, not counting delivery time for the device.
A hardware wallet is a small USB or Bluetooth device that stores your private keys on a secure chip. When you want to send funds, the transaction is signed inside the device itself, so your keys are never exposed to malware on your computer. The trade-off is that you become fully responsible for your keys: there is no password reset and no customer support line that can recover your funds. This guide is built around protecting you from the mistakes that cause people to lose money at this stage.
Difficulty: Beginner | Time: 45-90 minutes (plus shipping time for the device)
What You’ll Need
Tools & Materials:
- A new hardware wallet from the manufacturer’s official website (Ledger, Trezor, Coldcard, BitBox, or Keystone)
- A computer with an up-to-date browser, or a smartphone if your device supports Bluetooth or NFC
- The USB cable that comes in the box (do not substitute a random cable)
- A pen and the blank recovery sheets supplied in the box
- A private location with no cameras, screens visible to windows, or other people present
- Optional: a metal backup plate for engraving or stamping your recovery phrase
Knowledge:
- Basic familiarity with sending crypto from an exchange (you will copy an address and paste it into a withdrawal form)
- Ability to recognize phishing sites and avoid clicking links from emails or ads
- No coding or command-line skills required
Order the device only from the official manufacturer website — never from Amazon, eBay, or third-party sellers. A pre-tampered device with a pre-filled recovery sheet is one of the most common theft scams. Expect to pay $60–$200; suspiciously cheap devices are a red flag. Plan to be home for delivery so the package is not left unattended.
Before starting, make sure any crypto you plan to move is accessible: log in to your exchange account, confirm you can withdraw, and check that withdrawal limits or holds won’t block your test transaction.
Tangem Crypto Wallet (Pack of 2) – Cold Storage Hardware Wallet
The Tangem Wallet takes a fundamentally different approach from every other hardware wallet in this lineup: it’s a credit card-sized NFC device with no battery, no screen, and no cables. You tap it against your phone and you’re in. Compared with the Ledger Nano X, which needs charging and a dedicated app workflow, Tangem strips cold storage down to its most portable form — it genuinely fits in a wallet sleeve and can sit there for years without attention.Where Tangem pulls ahead of both competitors is durability and longevity. It’s waterproof to IP69K, shockproof, operates from -25°C to 50°C, and is rated for up to 25 years of use with a matching 25-year warranty. The Trezor Safe 3, by contrast, carries only a 2-year warranty and a conventional form factor that’s easier to damage. The two-card pack also solves backup elegantly: the second card is an end-to-end encrypted duplicate, so losing one card doesn’t lock you out — arguably friendlier than a 24-word seed phrase you must transcribe perfectly.The tradeoffs are real, though. There’s no on-device screen, so you’re trusting your phone’s display for transaction details — a philosophical difference from Trezor’s on-device confirmation model. And the entire system requires an NFC-capable smartphone; if your phone lacks NFC, this wallet is unusable. Coverage is broad at 90 blockchains and 14,100+ coins, tokens, DeFi, NFTs, and staking, which is slightly fewer chains than Ledger claims but more than enough for virtually any portfolio.
Pros:
- No batteries, cables, or setup — works instantly via NFC tap to phone
- Exceptional durability: IP69K waterproof, shockproof, and rated for up to 25 years with a matching warranty
- Smart two-card encrypted backup means losing one card doesn’t compromise access
- Broad support for 90 blockchains, 14,100+ coins, tokens, DeFi, NFTs, and staking
Cons:
- Requires an NFC-capable smartphone to function at all
- No on-device screen, so transaction verification depends on your phone
- Restrictive Amazon return policy (30 days, potential restocking fees)
Best for: Buyers who want the simplest, most durable cold storage setup and already own an NFC-capable smartphone.
Not ideal for: Anyone with an older phone without NFC, or users who insist on a physical screen to verify transactions on the device itself.
Bottom line: For most crypto holders, the Tangem Wallet’s combination of extreme durability, effortless NFC access, and clever two-card backup makes it the most complete package here.
“For most crypto holders, the Tangem Wallet’s combination of extreme durability, effortless NFC access, and clever two-card backup makes it the most complete package here.”
Ledger Nano X – Crypto Hardware Wallet with Bluetooth
The Ledger Nano X is the pick for people who actually interact with their portfolio regularly rather than parking coins and forgetting them. It’s the only wallet in this lineup with Bluetooth, pairing with both iOS and Android so you can check balances, swap, and stake from the Ledger Live app without touching a cable. Compared with the Tangem, which also works over the air, the Nano X adds a small onboard screen and buttons for on-device transaction confirmation — a meaningful security layer Tangem omits.Asset support is the Ledger’s headline strength: 15,000+ coins and tokens manageable through a single app, edging out both Tangem and Trezor in breadth. The built-in battery makes it genuinely mobile, though it also introduces something neither competitor has: a component that degrades. The Tangem’s battery-free design will still be working decades from now, while a Nano X may eventually need replacement.Its weaknesses are mostly practical. Internal storage is a modest 2.05 MB, which limits how many apps you can install simultaneously — a real annoyance if you hold many different assets. It’s not compatible with Chromebooks, and the 1.1-inch display is serviceable but cramped next to the Trezor Safe 3’s clearer OLED. Still, for smartphone-first users who want the widest coin coverage with a screen-verified workflow, this model makes the most sense.
Pros:
- Bluetooth connectivity for true mobile use with iOS and Android
- Supports 15,000+ coins and tokens through one app — the broadest coverage in this lineup
- On-device screen and buttons for verifying transactions away from your phone’s display
- Secure encrypted storage with Genuine Check authentication during setup
Cons:
- Only 2.05 MB of storage limits how many wallet apps fit at once
- Not compatible with Chromebooks
- Battery-dependent design means eventual degradation unlike Tangem’s battery-free card
Best for: Active traders and mobile-first users who want Bluetooth access to a very large range of assets from iOS or Android.
Not ideal for: Chromebook users, set-and-forget holders who’d benefit from Tangem’s battery-free longevity, or those annoyed by juggling app storage limits.
Bottom line: If you manage crypto primarily from your phone and want maximum asset coverage with Bluetooth convenience, the Ledger Nano X is the strongest mobile option here.
“If you manage crypto primarily from your phone and want maximum asset coverage with Bluetooth convenience, the Ledger Nano X is the strongest mobile option here.”
Trezor Safe 3 Crypto Hardware Wallet (Cosmic Black)
The Trezor Safe 3 appeals to a specific type of buyer: one who wants visible, deliberate security controls rather than maximum convenience. Its EAL 6+ Secure Element matches the Tangem’s certification grade, but Trezor layers on passphrase protection — an additional secret beyond your recovery phrase that can hide wallets behind plausible deniability. Neither the Tangem nor the Nano X in this comparison offers that combination in quite the same transparent way.Where the Safe 3 differentiates itself most is recovery design. Multi-share Backup splits your wallet’s recovery information across several shares, eliminating the single point of failure that a traditional written-out seed phrase represents. Compare that to Tangem’s second-card approach — simpler, but both cards live in the same ecosystem — and the Nano X’s conventional seed phrase, and it’s clear Trezor thought hardest about worst-case scenarios.The compromises are about workflow. It connects only via USB-C, so there’s no wireless use whatsoever — a step behind both the Bluetooth Ledger and the NFC Tangem. Full asset management runs through Trezor Suite, which some buyers will find restrictive compared with Ledger’s broader third-party app ecosystem. Setup takes about 15 minutes, which is fast, and the crisp OLED screen makes on-device confirmation genuinely readable, unlike the Nano X’s cramped display. With only a 2-year warranty versus Tangem’s 25, this is a device you’re trusting for its engineering, not its durability guarantees.
Pros:
- EAL 6+ Secure Element combined with passphrase protection for layered security
- Multi-share Backup removes the single point of failure in wallet recovery
- Clear OLED screen makes on-device transaction confirmation easy to read
- Quick, guided setup in about 15 minutes
Cons:
- USB-C only — no Bluetooth or NFC for wireless use
- Full asset management requires the Trezor Suite software
- Only a 2-year warranty compared with Tangem’s 25-year coverage
Best for: Security-focused holders who value passphrase protection, Multi-share Backup, and on-device verification over wireless convenience.
Not ideal for: Buyers who want mobile or wireless access, or anyone who prefers managing assets outside the Trezor Suite software.
Bottom line: The Trezor Safe 3 is the choice when recovery flexibility and layered security matter more to you than mobile convenience.
“The Trezor Safe 3 is the choice when recovery flexibility and layered security matter more to you than mobile convenience.”
As an Amazon Associate we earn from qualifying purchases.
Before You Start
Do not rush this task and do not do it in public. The single most sensitive moment is writing down your recovery phrase. Anyone who photographs or copies that phrase can steal all funds on the wallet, permanently, with no recourse.
Check the box before opening: the seal and packaging should be intact. Some manufacturers include a holographic seal or tamper-evident bag — photograph it before breaking it. If the recovery sheet inside the box is already filled in, or if the device arrives with a PIN already set, stop and do not use it. A genuine device forces you to generate a fresh seed yourself.
Also decide now where you will store your recovery phrase long-term (a home safe, a safe deposit box, or split across two secure locations). Do not plan to store it as a photo, in a password manager note, in cloud storage, or in an email to yourself.
Step-by-Step Instructions
Step 1: Inspect the device and verify authenticity
Unbox the device on a clean surface and examine the packaging, seals, and included recovery sheets. Confirm they are blank and unused. Then find the device’s genuine check: for Ledger, the secure chip generates a unique attestation number you can verify in Ledger Live; for Trezor, check the hologram and run the firmware check at the official web suite (trezor.io). Connect the device only after this visual inspection.
Tip:Type the manufacturer’s URL directly into your browser instead of searching for it. Paid ads frequently impersonate wallet vendors and lead to phishing clones.
Check: The device powers on, shows the manufacturer’s boot screen, and reports genuine/verified status in the official app or web check.
Step 2: Install the official companion app
Download the wallet’s official desktop app or mobile app — for example Ledger Live or Trezor Suite — directly from the manufacturer’s site or the official app store. Install it, and let it update the device firmware if prompted. Firmware updates wipe the device, which is fine at this stage because there are no funds on it yet.
Tip:If a firmware update is offered, do it now, before generating your seed. Updating after funds are loaded adds unnecessary risk and stress.
Check: The app opens, recognizes the connected device by model name, and shows the current firmware version with no update prompts remaining.
Step 3: Create a new wallet and generate your seed
Choose the option to create a new wallet rather than restore an existing one. The device will generate a recovery phrase — usually 24 words for Ledger and Trezor models. Watch the device screen (not your computer) as the words appear. This is the master key to every address your wallet will ever produce.
Tip:Words appear only once and only on the device screen. There is no legitimate way to view them again later without resetting the wallet, so give this step your full attention.
Check: The device displays all 24 words in sequence, then moves to a confirmation quiz.
Step 4: Write down the recovery phrase on paper
Copy each word by hand onto the supplied recovery sheet, in the exact order shown, spelling each word exactly as displayed. Number each slot. Do not type them into your computer, photograph them, or say them aloud to voice assistants. Take breaks between screens if needed — accuracy matters more than speed.
Tip:Write the words yourself rather than having someone else transcribe. Double-check spelling on similar words (for example “site” versus “vote”) — a single wrong word can make the backup useless.
Check: All 24 words are written legibly in numbered order on paper, and the phrase matches what the device displayed.
Step 5: Confirm the phrase on the device
The device will quiz you by asking you to select specific words — for example, “Select word 7.” Use the buttons or touchscreen to pick each requested word from a list. This verifies your written backup is correct. Answer every prompt from your paper sheet, not from memory.
Tip:If you cannot find a requested word on your sheet, you transcribed it wrong. Use the device’s back option if available, or reset and start the seed generation over with a fresh sheet.
Check: The device accepts all confirmation answers and proceeds to the next setup stage without errors.
Step 6: Set a strong PIN
Choose a PIN of 6–8 digits (length varies by model). Enter it once, then confirm it when asked. This PIN unlocks the device for signing — it does not recover funds if forgotten. Pick something you will not forget but that a stranger could not guess in a few tries. Devices wipe themselves after a limited number of wrong PIN attempts (often 3 or 16 depending on model).
Tip:Avoid birth years, repeated digits, and sequences. A wrong-guess wipe erases the seed but not your funds — you can restore with the recovery phrase — but you would redo the whole setup.
Check: The device locks, and unlocking it with your PIN shows your wallet dashboard in the companion app.
Step 7: Add the accounts you need
In the companion app, add accounts for the coins you hold — Bitcoin, Ethereum, and others. The app generates receiving addresses derived from your seed. For Bitcoin, consider enabling a passphrase or checking address verification on the device screen. You do not need one account per exchange holding; you will send everything to the addresses shown here.
Tip:Keep the number of distinct coins modest at first. Each additional account adds backup and tax-tracking complexity.
Check: Each added account shows a balance of zero and a receivable address in the app.
Step 8: Send a small test transaction first
Go to your exchange, withdraw a small amount of crypto (roughly $20–50 worth), and paste the receiving address from the companion app. Before confirming, verify the address on the hardware wallet screen itself — click the “verify on device” option and check that the first and last several characters match what you pasted. Confirm the withdrawal on the exchange.
Tip:This is the step that catches clipboard-hijacking malware, which swaps pasted addresses silently. Never skip on-device verification, even for tiny amounts.
Check: After the network confirms the transaction, the balance appears in your hardware wallet app, matching the amount sent minus network fees.
Step 9: Transfer the rest of your funds
Once the test transaction arrives, withdraw the remainder of your holdings in one or more batches, verifying each address on the device screen every time. For large amounts, consider splitting across multiple transactions to reduce the impact of a mistake. Wait for each transaction to confirm before sending the next batch.
Tip:Leave a small dust amount on the exchange if you plan to trade occasionally — or withdraw everything if your goal is full self-custody. Decide based on how you use your funds.
Check: Your exchange balances show zero (or your intended residual), and the hardware wallet app shows the full expected balances.
Step 10: Secure your recovery phrase for the long term
Store the paper backup somewhere protected from fire, flooding, and discovery. For meaningful balances, transfer the phrase to a metal plate (stamp or engrave the words in order) and store it in a safe or safe deposit box. Consider a second copy at a separate geographic location. Never store the phrase digitally in any form.
Tip:Tell one trusted person that the backup exists and where to find it — without showing them the phrase unless they would need it in an emergency. Many crypto inheritances are lost simply because no one knew a backup existed.
Check: The phrase is physically secured, recoverable by you under a house fire scenario, and accessible to your designated trusted person if you become incapacitated.
Common Mistakes to Avoid
- Buying from a third-party marketplace and receiving a tampered device with a pre-filled recovery phrase — Order only from the official manufacturer website. If a device arrives with any seed words already written down or a PIN already set, do not fund it — contact the manufacturer.
- Storing the recovery phrase digitally — a photo, cloud note, password manager, or email — Paper or metal only. Any device connected to the internet can eventually be compromised; a paper sheet in a drawer cannot be hacked remotely.
- Sending the full balance without a test transaction and pasting an address without checking it on the device screen — Always send a small amount first, and always verify the receiving address on the hardware wallet’s own screen before confirming any withdrawal, no exceptions.
- Setting a weak PIN or forgetting the PIN entirely — Use a 6–8 digit PIN you can remember reliably but that isn’t tied to personal dates. If you fear forgetting it, store a hint (not the PIN itself) with your recovery phrase backup.
Troubleshooting
Problem: The companion app does not detect the connected device
Solution: Try a different USB port directly on the computer (not a hub), use the original cable, and close other wallet software. On Windows, a pending driver install may need to finish. If the device shows power but no recognition, test the cable with another device — many USB cables are charge-only.
Problem: A wrong word is discovered during the device’s confirmation quiz
Solution: Re-check your paper against the word lists shown; if you truly transcribed wrong, reset the device to factory settings and generate a new seed from scratch with a fresh recovery sheet. Do this before any funds are on the wallet — it is painless at this stage and impossible to fix safely later.
Problem: The test transaction does not appear in the wallet app
Solution: Check the transaction status on a public block explorer using the exchange’s withdrawal transaction ID. If it shows as confirmed but the app balance hasn’t updated, refresh or re-add the account. Confirm you withdrew on the same network the wallet expects — sending USDT on the wrong chain, for example, can make funds appear missing.
Problem: undefined
Solution:
Problem: You forgot the device PIN
Solution: Enter wrong PINs until the device wipes (or use the reset option). Then restore the wallet using your recovery phrase, which will regenerate all your addresses and balances. This works only if your paper backup is accurate — another reason the confirmation quiz in setup matters.
What Success Looks Like
Your setup is complete and correct when all of the following are true: the device passes the manufacturer’s authenticity check; the companion app shows all your intended coin accounts with the balances you transferred; your exchange shows zero or your intended residual balance; your recovery phrase is written on paper or metal, stored securely, and was verified by the device’s confirmation quiz; and you can complete a full round trip — unlock the device with your PIN and see your funds. As a final proof of self-custody, you can optionally practice recovery: wipe the device on purpose and restore from your paper backup. If your balances reappear after restore, you have proven you could survive losing or breaking the device.
Next Steps
Practice good ongoing habits: unlock the device only when actively signing a transaction, and keep firmware updated — check monthly, since updates patch security issues. Review where your recovery phrase is stored once a year; paper degrades and life circumstances change. If you later hold life-changing amounts, consider adding a passphrase (a “25th word”) for plausible deniability, and verify that whoever would handle your affairs knows how to access the backup. When receiving large incoming amounts in the future, generate a fresh receiving address each time rather than reusing old ones. If you ever sell the device, reset it to factory state first — the new owner cannot access your funds without your phrase, but leaving it clean avoids confusion.
Frequently Asked Questions
Can I hold multiple cryptocurrencies on one hardware wallet?
Yes. A single seed phrase controls many accounts across Bitcoin, Ethereum, and hundreds of other chains. In the companion app you simply add each account you need, and all of them are backed up by the same 24-word recovery phrase. You do not need a separate device per coin.
What happens if I lose or break the hardware wallet?
Your funds are not on the device — they are on the blockchain, controlled by your recovery phrase. Buy a new device (any compatible model from the same manufacturer), choose “restore wallet,” and enter your 24 words. All your accounts and balances reappear. This is why the paper backup, not the device itself, is the thing you must protect above all.
Do I need the hardware wallet connected to check my balance or receive funds?
No. Receiving addresses can be generated and balances viewed in the companion app without the device plugged in, because public data lives on the blockchain. The device is only required when you sign an outgoing transaction. You can monitor your holdings from your phone at any time.
Is it safe to type the recovery phrase into a website to check my balance?
Never do this. No legitimate service asks for your recovery phrase. Any site, app, or “seed checker” requesting it is a phishing scam designed to steal your funds instantly. The phrase should only ever be typed on the hardware wallet’s own screen or written by hand on paper.
How much crypto do I need before a hardware wallet makes sense?
A common guideline: if losing your holdings would genuinely hurt, and the device costs $60–200, the math usually favors self-custody. Beyond value, it also matters if you hold coins long-term on an exchange — you remove exposure to exchange freezes, hacks, and withdrawal suspensions. For very small, actively traded amounts, keeping a modest balance on an exchange is reasonable.
Evergreen bestsellers Picks
bestsellers
As an affiliate, we earn on qualifying purchases.