
TL;DR
Moving your rig into a closet or another room is the most effective way to cut noise. Proper placement and ventilation are key, especially in small spaces. Foam alone won’t solve all problems — focus on barriers, distance, and airflow.
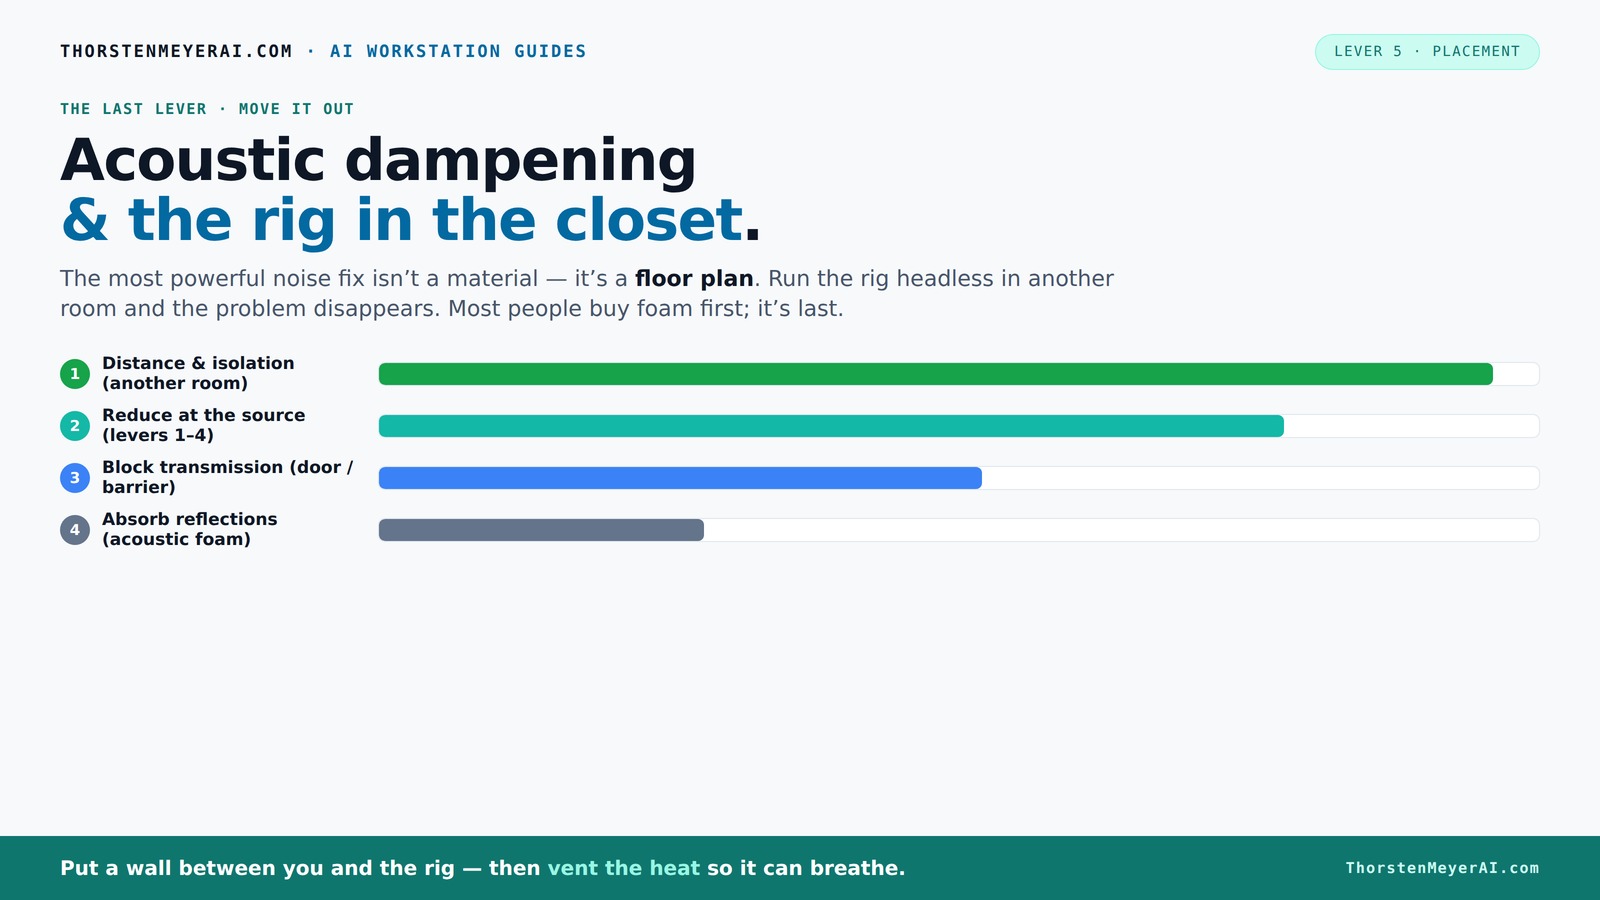
Acoustic dampening
& the rig in the closet.
The most powerful noise fix isn’t a material — it’s a floor plan. A rig you can’t hear because it’s in another room beats any amount of foam. Tap the approaches in Part 1 to see what actually works.
(another room)
(levers 1–4)
(door / barrier)
(acoustic foam)
Contain the noise, not the heat
Key Takeaways
- Always prioritize moving your rig away from your workspace before investing in absorption or barriers.
- Ventilation is critical in closet setups — without airflow, your hardware overheats and noise increases as fans ramp up.
- Use a combination of soundproof barriers, acoustic treatment, and strategic placement of panels for best results.
- Seal gaps around doors and vents to prevent sound leaks, using simple DIY tricks like blankets and weatherstripping.
- Choose microphones that focus on your voice to minimize room noise, especially in small, treated spaces.

Moukey Acoustic Panels 4 PCS, 2.4“ Thick Fiberglass Soundproof Wall Panels 24''x12'', Self-adhesive Sound Absorbing Panels for Studios, Office, Home Theater (Black)
- Enhanced Sound Absorption: 2.4-inch thick for superior soundproofing
- Easy Self-Adhesive Installation: Simple to install with adhesive backing
- Wall Protection Design: Flat polyester fiber backing prevents wall damage
As an affiliate, we earn on qualifying purchases.
As an affiliate, we earn on qualifying purchases.
Why Distance Is the Biggest Noise Reducer — No Fancy Gear Needed
Moving your rig far away from your main workspace slashes noise more than anything else. Think of it like a sound barrier — the farther the source, the quieter it feels. If your GPU or CPU is in another room, you won’t hear its roar, period.
Imagine having a rig in a basement or closet, while you sit comfortably at your desk. The noise becomes almost invisible. This isn’t just about comfort; it’s about reducing auditory fatigue and creating a more focused environment. The implication is that physical separation minimizes the need for costly soundproofing materials. However, this approach requires planning for how you access and maintain your hardware. The tradeoff is convenience versus noise reduction — moving equipment may complicate troubleshooting or upgrades but offers unparalleled silence. For AI workstations, which often operate headless, this separation becomes even more effective, as you can manage the system remotely, eliminating the need for proximity and reducing ambient noise exposure.
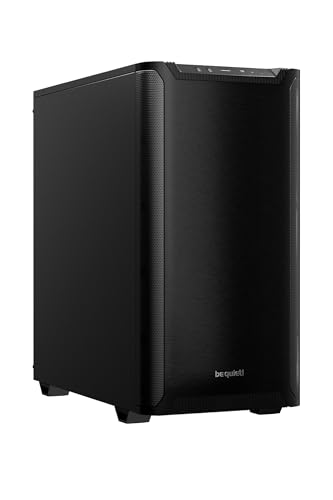
be quiet! Pure Base 501 Black ATX Case | 2 Preinstalled Pure Wings 3 140mm PWM Fans | Optimized Air Pressure | Compact PC Case | Vertical GPU Installation | USB 3.2 Gen. 2 Type C | BG073
- Minimalist Design: Clean, distraction-free appearance
- Optimized Airflow: Includes two PWM 140mm fans
- Quiet Operation: Reduces turbulence and noise
As an affiliate, we earn on qualifying purchases.
As an affiliate, we earn on qualifying purchases.
The 'Rig in the Closet' Setup — How to Keep It Cool Without Turning It Into an Oven
Placing a high-performance rig in a closet is a game-changer for noise reduction, but only if you handle airflow. Sealing a closet tight like a vault traps heat, making your hardware overheat and fans scream, which defeats the purpose of quiet operation. Overheating not only risks hardware longevity but also causes fans to ramp up, increasing noise and energy consumption.
To keep your rig cool, you need active ventilation — a quiet exhaust fan pulling hot air out and drawing cool air in. This creates a continuous airflow that prevents heat buildup. Even passive vents help, but they often aren’t enough in small, sealed spaces. A purpose-built soundproof cabinet with ducted airflow can offer both silence and temperature control, but it requires careful planning to balance soundproofing and ventilation. The tradeoff here is between noise reduction and thermal management: too much sealing without adequate airflow can turn your closet into a heat trap, risking hardware failure and increased noise from fans struggling to cool the system. For example, a recent setup kept a 600W GPU in a closet with a small, quiet exhaust fan. Temps stayed within safe limits, and the noise dropped by over 20 dB compared to a sealed, unventilated closet. This demonstrates that strategic ventilation is essential for safe, quiet operation.

Focusound 52 Pack Acoustic Foam Panels 1" x 12" x 12" Sound Proof Foam Panles Soundproofing Noise Cancelling Wedge Panels for Home Office Recoding Studio with 300PCS Double-Side Adhesive
- Soundproofing Design: Triangular grooves for noise absorption
- Includes Adhesive Tape: 300pcs strong double-sided adhesive included
- Easy Installation: Removable adhesive protects walls
As an affiliate, we earn on qualifying purchases.
As an affiliate, we earn on qualifying purchases.
Soundproofing vs. Dampening: What Really Stops Noise in a Tiny Space
Soundproofing and acoustic dampening are often confused, but they serve different purposes. Learn more about acoustic dampening. Soundproofing involves adding mass and barriers—like dense drywall, mass-loaded vinyl, or resilient channels—that prevent sound from escaping or entering a space. This is crucial when your environment requires complete isolation, such as in shared apartments, recording studios, or professional environments. Without proper soundproofing, noise leaks through gaps, vents, or thin walls, undermining your efforts to create a quiet workspace.
In contrast, dampening focuses on internal sound quality—reducing echoes, reverb, and internal reflections—by absorbing sound waves. Foam panels, blankets, and diffusers help soften internal acoustics but don’t necessarily prevent sound from escaping. Understanding this distinction is key: in a small space like a closet, you should combine both strategies—install barriers in the structure to contain sound and use internal dampening materials to improve clarity. The tradeoff is that soundproofing often adds weight and cost, while dampening is more about internal acoustic comfort. For example, sealing gaps around the door with weatherstripping and adding mass in the form of drywall or mass-loaded vinyl can significantly reduce sound leakage, while foam panels inside the closet improve voice clarity and reduce internal echo. The optimal setup balances these approaches for maximum effectiveness.

72in 3-Panel Soundproof Room Divider with Wheels, Heavy-Duty Acoustic
- Noise Reduction: Absorbs at least 85% of noise
- Silent, Self-locking Wheels: 12 wheels with 360° rotation and brakes
- Durable, Rust-proof Wheels: Reinforced metal base for longevity
As an affiliate, we earn on qualifying purchases.
As an affiliate, we earn on qualifying purchases.
Placement Secrets: Where to Put Acoustic Panels for Maximum Effect
Position matters more than coverage when it comes to acoustic dampening. Start with the reflection points — the wall behind your mic, the ceiling, and the side walls near your mouth. Use a mirror to find these spots: if you see the mic’s reflection, treat that area. Proper placement at these reflection points ensures that sound waves are absorbed where they are most likely to cause echoes or reverb, rather than just scattered randomly. This targeted approach maximizes your investment, giving you cleaner recordings and less ambient noise.
In a tiny closet, covering 20-30% of wall space with foam or fabric panels can significantly reduce echo and internal reflections. Focus especially on the ceiling, as sound often bounces off the hard surface overhead, contributing to unnatural reverb. Strategically placing panels at these reflection points—such as behind the microphone, on the ceiling, and at the side walls—targets the primary sources of echo and reverb. This method not only improves recording clarity but also prevents sound waves from bouncing around unnecessarily, which can cause muddiness. For example, a streamer installed foam panels on the ceiling and behind the mic, which cut reverb and made voice recordings sound clearer, even without sealing all gaps. The key is understanding how sound interacts with your specific space and customizing panel placement accordingly.
Tiny Space, Big Problems: Managing Low-End Buildup and Standing Waves
Small closets tend to amplify bass and create standing waves, which lead to boomy, uneven recordings. Find out how to manage low-end buildup. This occurs because low frequencies have longer wavelengths and tend to bounce between parallel surfaces, causing low-end buildup that muddies your sound. Recognizing and addressing these issues is essential for achieving professional-quality recordings.
Thick bass traps in the corners are the most effective solution—they absorb low frequencies at their source, preventing resonance and unevenness. Installing foam bass traps or thick panels in the closet corners disrupts the standing wave pattern, resulting in a more balanced frequency response. Without addressing these low-frequency issues, your recordings can sound muddy or unbalanced, reducing clarity and professionalism. For instance, a home studio added DIY bass traps in the closet corners, balancing the low end and improving voice clarity. Using a measurement microphone or app to detect problematic low-end buildup allows you to place traps precisely where needed. This targeted treatment minimizes low-frequency resonance, ensuring your voice and audio come through clean and natural, even in a small, reflective space.
How Much Coverage Do You Really Need? The 20-30% Rule of Thumb
Covering about 20–30% of your wall space with acoustic treatment is a proven guideline to reduce echoes and improve sound clarity. In a tiny closet, this means strategically placing panels on the ceiling, walls, and door to target reflection points and bass areas. The goal is to absorb enough sound energy to prevent excessive reverb without making the space feel overly dead or unnatural. Over-treating can create a muffled environment that hampers natural communication, while under-treatment leaves echoes that muddle the sound and reduce intelligibility.
Think of it as wrapping your space in a soft blanket—more coverage generally results in less echo and clearer sound. However, the law of diminishing returns applies: beyond a certain point, additional treatment offers minimal benefit and can even negatively impact the natural tone of your recordings. Use measurement tools or your ears to judge whether additional treatment improves clarity or just dulls the sound excessively. Starting with reflection points and corners is most efficient, then adjusting coverage based on actual acoustic response. This balanced approach ensures optimal sound quality without sacrificing naturalness or practicality.
Seal the Leaks: Doors, Gaps, and Cracks Are the Weak Points
Sound leaks through doors, gaps, and vents are major culprits in reducing your setup’s effectiveness. Sealing these leaks with weatherstripping, acoustic sealant, or hanging blankets over doors dramatically improves sound isolation. They prevent external noise from entering and internal sound from escaping, which is crucial in small, enclosed spaces where even minor leaks can undermine your efforts.
In a closet studio, a DIY fix like hanging a thick moving blanket over the door and sealing all cracks with foam or weatherstripping can cut noise leaks significantly. This simple step ensures that your sound remains contained and that external disturbances are minimized. Gaps around doors, vents, and electrical outlets can let sound escape or unwanted noise enter, reducing overall quietness. Using weatherstripping or draft seals is inexpensive and straightforward—just apply around the door frame. Hanging dense blankets or quilts over the door adds mass, further reducing leaks. For example, a streamer sealed their closet door with weatherstripping, reducing outside noise pickup by over 50% and making voice recordings much cleaner. The key is identifying and sealing all potential leak points to maximize sound isolation.
DIY Tricks for a Quiet, Functional Closet Rig — No Construction Needed
Many DIYers turn closets into quick studios using blankets, foam, and clever placement. Suspend foam panels from the ceiling with hooks or use freestanding frames—these solutions are quick, cost-effective, and reversible. Hang blankets over doors or open sides to absorb echoes and prevent sound from bouncing around. These methods allow you to create an effective recording environment without permanent modifications, making them ideal for shared or multi-purpose spaces.
For example, a YouTuber used a tension rod to hang foam panels in their closet, creating a portable vocal booth that’s easy to move and reconfigure. These setups are budget-friendly, adaptable, and require no construction skills. The key is flexibility: your setup should be easy to modify or move as needed, especially if your space is shared or multi-purpose. Incorporate portable sound shields or DIY baffles made from inexpensive materials like foam, blankets, or cardboard covered with fabric. Using command hooks, tension rods, or adjustable stands enables quick adjustments and reconfigurations, ensuring your setup remains versatile and effective. This approach maximizes sound quality without damaging walls or requiring permanent fixtures, making it perfect for temporary or evolving needs.
Choosing the Right Mic and Equipment for Tiny Spaces
In small, treated rooms, mic choice matters just as much as treatment. Directional mics like a shotgun or cardioid condenser focus on your voice and reject room noise better, which is vital in tight spaces where reflections are unavoidable.
Think of it like a spotlight — the more focused, the less room sound it picks up. Using a reflection filter or portable shield further isolates your voice from nearby surfaces, reducing reverb and ambient noise. In a tiny closet, a dynamic mic like the Shure SM7B or a small condenser with a pop filter often produces cleaner recordings because they inherently reject more room noise. Pairing these with a high-quality microphone preamp can also enhance clarity. The tradeoff is that these microphones are often more expensive, but their ability to focus on your voice and reject unwanted sound makes them invaluable for small, acoustically challenging environments. Proper mic placement—close to your mouth—further minimizes room reflections, resulting in clearer, more professional recordings.